© 2024 Tales from Outside the Classroom ● All Rights Reserved
Get Organized with Google Keep
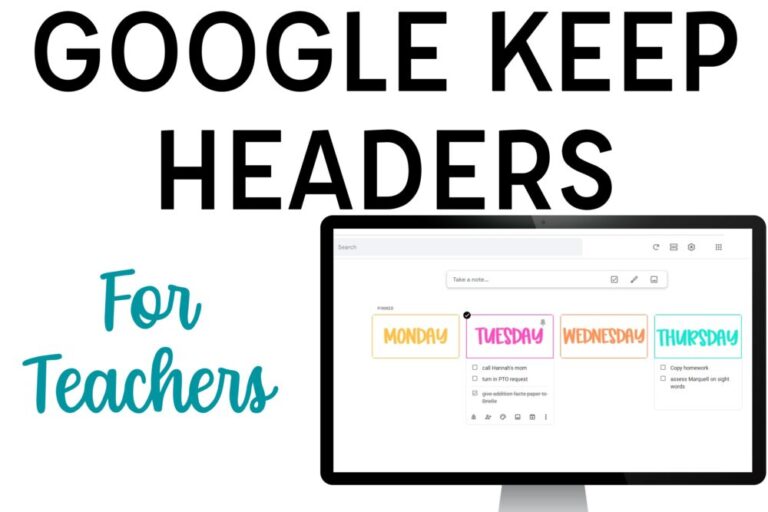
I first discovered Google Keep when I noticed the icon on my Google Calendar. I immediately fell in love! My first uses for Google Keep were personal: to make my grocery shopping list, keep notes when I was away from home, and to store random information I needed (like what size my furnace filter is). I slowly started using it more and more for my business and my classroom and I’ve never looked back! I’m able to track my students’ missing work, have Post-its and to-do lists from school available at home, and keep track of information in one easy-to-access place. Google Keep is a fantastic digital organization tool and it’s perfect for teachers!
Google Keep
You can access Keep on the web, on your phone (and Apple), and within other Google products. Like other Google products, you are able to access Keep with all of your accounts by toggling between them in the corner. I have two separate sets of Keep notes: one for school, and one for home. Either set is accessible from anywhere with just a quick toggle, and it helps me to stay organized to have things separated.
I also love using Keep within other Google apps when I’m in meetings. I’m able to stay right on the same page as the meeting agenda or notes, and then write myself a note to keep for later. This has been so helpful for me during data meetings and intervention conversations. I love that I can click the Keep icon, click “Take a Note” and a new note is created with a link to that Google file. That way, I know my note is tied to that specific file. This is especially helpful when the note is related to a student, or something I need to enter information on later. I don’t need to go to my Google Drive to find the right spot to put the information- the link is right in the note!
Notes or Checklists
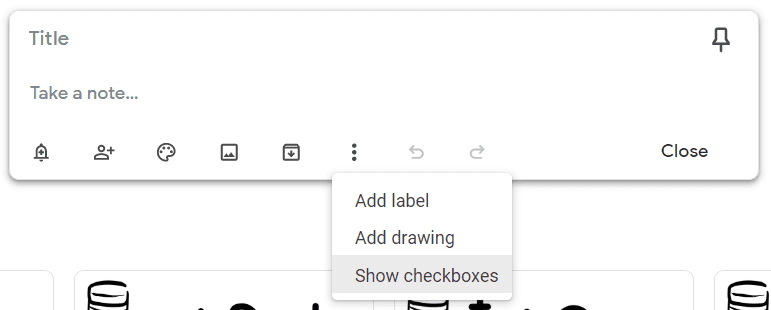
One of my favorite parts of Google Keep is that you can change the note to a checklist in just a click of a button. Notes are the default option. To turn it into a checklist, just click the three dots to get more settings, and then click “show checkboxes”. The note will turn into a list.
This makes it so easy to use Google Keep to track things like missing assignments or reteaching groups. When that missing assignment is turned in, just check it off the list. Instead of just getting crossed off or disappearing, it’s crossed off but then moved to the bottom of the checklist. If you make a mistake, you can find that row crossed out at the bottom. Just hover, click the checkbox, and it’ll move right back to the top.
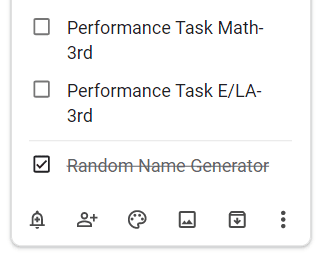
You can also delete the checked items from a checklist to keep things neat and tidy. I don’t tend to do this immediately after I’ve checked something off, but will clean up my lists from time to time to remove those tasks I’ve already done.
Google Keep Organization
In order for a tool to help you stay organized, it needs to be organized itself. Google Keep has a few built-in features that helps you arrange your notes and checklists. You can drag-and-drop each of the notes to the layout you’d like best. At home, I use Keep to make myself a digital to-do list to keep me focused on my goals. I organize the days of the week at the top with more goal-focused notes at the bottom.
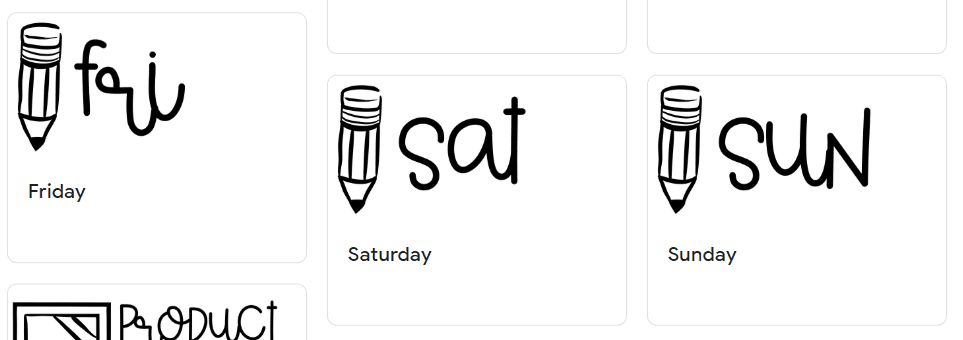
While I absolutely love being able to organize each note how I would like, I have one small complaint. See how Friday doesn’t align with Saturday and Sunday? That’s because the row above has a shorter note above Friday. I would love to be able to place each of the notes in a grid so everything lined up both vertically and horizontally. It’s a small complaint, I know, I’m very particular about things lining up in neat rows and columns. 🙂
Header Images
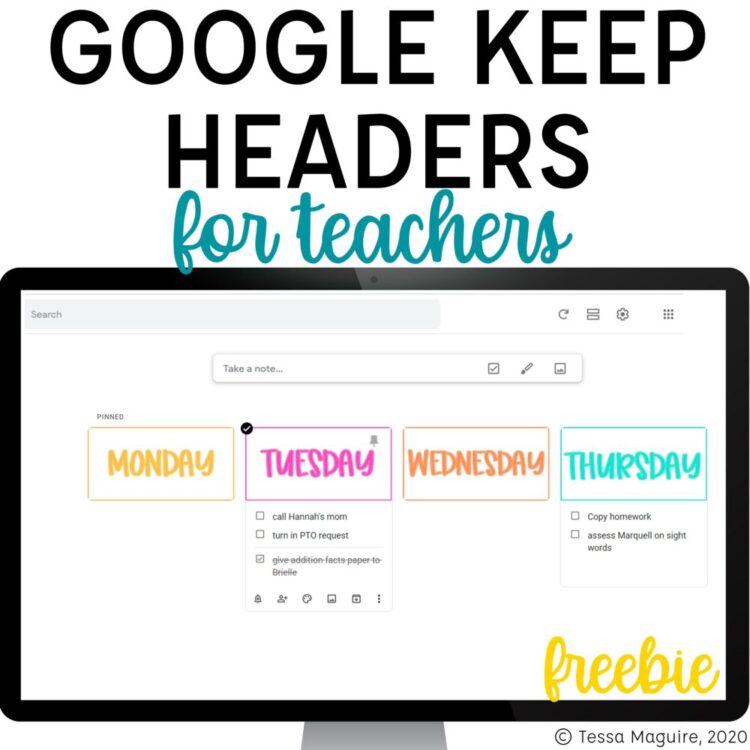
The days of the week shown in the image above are images added right to the note! Images are always added to the top of notes and checklists so using those images as organizational tools is a great way to arrange your notes. At home, I use the days of the week to track my daily and weekly to-do lists. I also have several headers for my goals. At school, I use headers to keep track of things like missing work, intervention cycles, and tasks I need to work on next.

You can download my Teacher Google Keep Headers to help organize Keep for your home and your classroom. There are 75 headers included, with 25 in each of 3 styles: one black and white, and two colorful options.
Pinned Notes
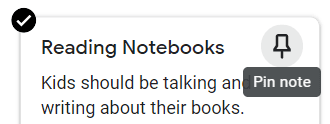
One of the features I like best about Google Keep is the pinned notes option. To pin a note, just hover over the top right corner of the note and the push pin icon comes up. Just click it, and then that note moves or stays at the top. This is handy for building some separation between types of notes. Perhaps you keep your to-do lists pinned at the top and your student checklists at the bottom. Notes you use more often can be more readily accessible than others.
Colors
Whether you like things black and white, or full of color, Google Keep allows you to customize the color of each of your notes. You can use the colors as an organizational tool. Or, just use color for visual appeal.
Other Google Keep Tips
There are so many other components of Google Keep that I love and that make it great both in the classroom at home. Here’s some of the other components available:
Search
Searching your notes is so simple! Just type it in to the top search bar and go. Google Keep also is able to search the content of images you have saved! While that’s definitely not a perfect search, it can be useful if you use Keep notes to save images you want to reference later.
Labels
Just like Gmail, Keep allows you to label your notes. If you’re using Keep to track a lot of pieces of information, it can be helpful to use the labels to narrow down what’s displayed at certain times. You can customize the labels to any topic you need. You can also number the labels so they are displayed in a specific order. If you’re someone that loves emojis, just copy and paste one to keep things visually appealing.
Reminders
Reminders are one of the less well known features of Keep but it’s one of the best! On the bottom left hand corner of the note is the clock icon.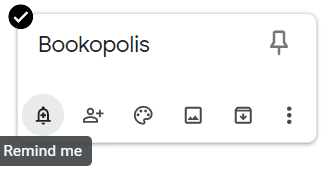
The reminder menu allows you to choose from a time based reminder (what we’d traditionally expect), and a location based reminder (ok, what?). The time based reminders allow you to get a notification (on Chrome if you have that setting enabled, and on your phone if you have the app) at a time you specify. You are able to configure the reminder to be a time of a day, or a specific time. There’s also “tomorrow” and “next week” built in as quick time options.
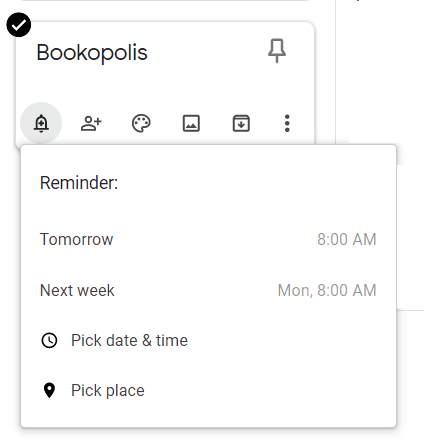
But now my favorite part- the location based reminder. How many times do you forget to do something in the morning at school that you thought of the night before?
“When I get to work in the morning I need to quickly copy the math exit ticket that I forgot today!”
Yes, you can have your phone’s assistant remind you at a specific time. But, you can also set up a location reminder in Keep. You are able to put in specific addresses, built-in locations that you have Google recognize (I have mine set up for home and work), or the names of places. Then, when you get there, your phone will send you that reminder!
Images
You don’t have to use the images feature just for headers. While that’s the area the image always goes, you can definitely keep other images in Keep to keep track of. If you don’t add other text to the note, the image is displayed basically on its own. This is great for taking images of things you want to remember. Like a parking spot in a garage during a vacation. Or, the paint color you’re painting your kitchen. In the classroom, this might be a student’s work on a whiteboard. Then you’re able to label all of that student’s work with his/her name and keep copies of those images all in one place.
Recordings
On the app, you can record yourself and save it as a note. Google also transcribes it and adds it as text to the note. With the recording available on the note to reference, it’s a nice way to save some time over typing- especially on a phone.
Collaboration
You can add collaborators to specific notes which makes this such a great grade-level collaboration tool. Just click the add collaborators icon and share. Planning your grade level performance and need to divvy up the tasks? Make a checklist, share with your team, and work together. Each of you will know what’s already done and can keep track of the project together.
Google Keep Chrome Extension
If bookmarks and Pinterest aren’t enough web organization tools for you, then Google Keep is there for you! With their Chrome extension, you’re able to save a text or an image from a website just with a simple right click. For text, highlight what you’d like, right-click, and choose to save to Keep. The note includes the link to the specific site the text came from. You can also use the Chrome extension to save from the page.
Click here to download my Google Keep Headers for Teachers. There are 3 different designs to choose from with 25 different headers in each. You may also be interested in the other Google posts and tutorials.

Newsletter Sign Up
Signup for my weekly-ish newsletter. I send out exclusive freebies, tips and strategies for your classroom, and more!
Please Read!
You have successfully joined our subscriber list. Please look in your e-mail and spam folder for Tales from Outside the Classroom. Often, the confirmation email gets overlooked and you're night signed up until you confirm!

Hi! I’m Tessa!
I’ve spent the last 15 years teaching in 1st, 2nd, and 3rd grades, and working beside elementary classrooms as an instructional coach and resource support. I’m passionate about math, literacy, and finding ways to make teachers’ days easier. I share from my experiences both in and out of the elementary classroom. Read more About Me.



9 Comments
Awesome! I didn’t have a clue about Google Keep! So ready to get started though!
I hope you love it as much as I do!
Do you remember what font you use for the headers? I love the ones you made but would like to add a couple more, of course to match.
I used different fonts by different font creators. Which particular style are you trying to match?
The ones you made with the colored bar to the left. Maybe the more square font
That one is KALagoon. The smallest bundle you can purchase it in is this one: https://www.teacherspayteachers.com/Product/KA-Fonts-Font-Bundle-Set-51-5278073
She often lists her fonts outside of TpT as part of bundles. Like FontBundles.net. It might be worth searching to see if you can find it anywhere else. Her fonts are pretty great though!
How do you create two separate lists (personal vs. school)? I’m totally new to Keep!
You can create lists for anything, so in one account you can keep lists for both. Or, you can set it up by account. Because Keep is a Google product, everything syncs to that account. So I just toggle between accounts to access the other lists. Or, most recently, I’ve been using Chrome with two separate accounts since I can open windows up by account, so I only have the one account signed in on each. Does that help?
That makes sense. Thank you! 🙂