© 2024 Tales from Outside the Classroom ● All Rights Reserved
Writing Process Folders {and a freebie!}
Record keeping with writing can be a difficult process if you aren’t organized, so I knew I wanted to establish some system in my room right from the start that would help. By having these folders and clip chart, I will be able to easily know where students are (by looking in their folders) on top of the daily conferencing that I will be doing. I thought that I’d share with you what I’ll be using in my room.
My big focus in my time away from training and life this week has been my writer’s workshop and what I need to get going. We are going to be getting the intermediate set of Units of Study from Lucy Calkins (yay!) but I haven’t had a chance to delve into it yet. I know from my experience with teaching from the primary set in the past, that she focuses quite a bit on the writing process (and I love that!) so I knew it was safe to align with that.
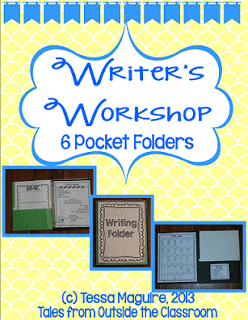
I recently saw the Writer’s Workshop folders from Rowdy in Room 300 and I loved them- but knew they wouldn’t work for my third graders. They inspired me to make my own. I previously thought I might just buy the 8-pocket, spiral bound sort or that I’d buy the ones Really Good Stuff makes. They’re really expensive, though. Instead, I made these, and I’m in love!
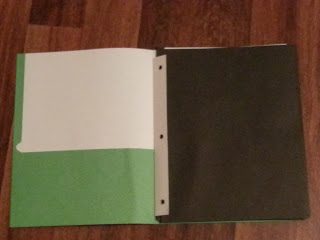
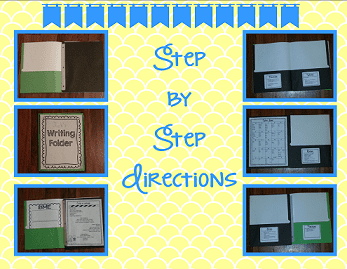
I started with three folders (two without prongs and one with). I hole punched two folders (one on the fold, and one inside out) so that I had 6 pockets with two non-pocketed sides inside. This gives 6 pockets.
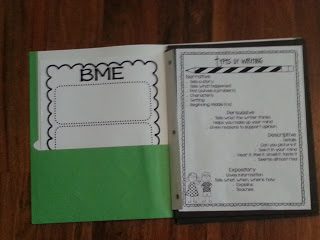
I use 5 for each step of the writing process, and then there’s one extra that you could use for anything you wanted. Instead of folding both inner folders inside out like I’ve seen others do, I kept one the other way so I could have to spaces to put things on.
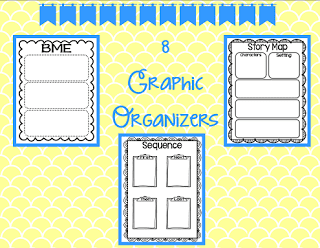
I created graphic organizers, a genre reminder, a word bank, and labels for reminders along the way. Then I put everything together! I put the genre reminder and the word bank on those blank walls inside. I put the labels on each pocket.
When I decided to put it on TpT, I knew I needed some things….like step by step directions.
I used Avery labels 5264 and include PDFs for easy printing with that label size. Just click on the pictures to head to TpT to check this out a little closer.
Also, as my students work through the process, I like to track where they are using a clip chart. This helps me easily see where each student is, and helps me encourage those few kiddos to slow down or to keep up 🙂
It has to match my decor {of course!} so I plan on using the black and white chevron set. I’ve also included sets in yellow and white chevron, and pink and lime green polka dots. Just click the picture to head to my TpT store to download this freebie.
I’m getting mine ready to hang this week!
How do you manage the writing process in your classroom?

Newsletter Sign Up
Signup for my weekly-ish newsletter. I send out exclusive freebies, tips and strategies for your classroom, and more!
Please Read!
You have successfully joined our subscriber list. Please look in your e-mail and spam folder for Tales from Outside the Classroom. Often, the confirmation email gets overlooked and you're night signed up until you confirm!

Hi! I’m Tessa!
I’ve spent the last 15 years teaching in 1st, 2nd, and 3rd grades, and working beside elementary classrooms as an instructional coach and resource support. I’m passionate about math, literacy, and finding ways to make teachers’ days easier. I share from my experiences both in and out of the elementary classroom. Read more About Me.






12 Comments
Great ideas! Thanks a bunch for sharing it!
Carla
Comprehension Connection
Thanks so much for sharing your writing folder ideas! I LOVE the writing process clip chart.
Krista
Stellar-Students
These look fabulous Tessa!!
Thank you!
Teach Love
great organization! thanks for sharing.
Thanks for your ideas! I just received the Lucy Calkins Units of Study, too. I started reading and it looks like a fantastic resource! Hope we can compare notes!
So cute!! Thanks so much!
-Caitlyn
Fourth Grade Lemonade
Hi! I'm not sure if I'm doing this right because I'm a newbie, but I'm trying to "link up." I found you on "Oh Boy, Fourth Grade." Awesome blog! Stop by mine anytime at http://www.nickisnotepad.blogspot.com. Happy blogging!
The folders hooked up like that are so smart!
NIce ideas!
Oooooh, I love this!! Thank you, Tessa! I can't wait to make mine tomorrow!! 🙂
Abby
Third Grade Bookworm