


I’ve introduced and worked on fractions using a variety of tools and resources over the years. In 1st grade, we explore fractions as part of our Halfway Day celebration on day 90- halfway through the school year. In third grade, I expect my students to have some understanding of fractions from their work in previous years, but, they always seem to need me to start with the basics. Over the years, I’ve found that what I do to introduce fractions helps lay the foundation for a successful fractions unit. Here’s a look at my tried and true strategies and resources for during our introduction to fractions.
Introduction to Fractions with Fractions Strips
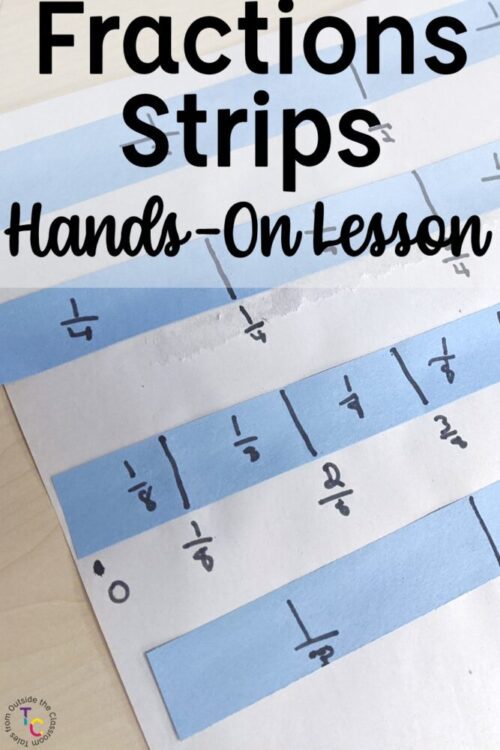
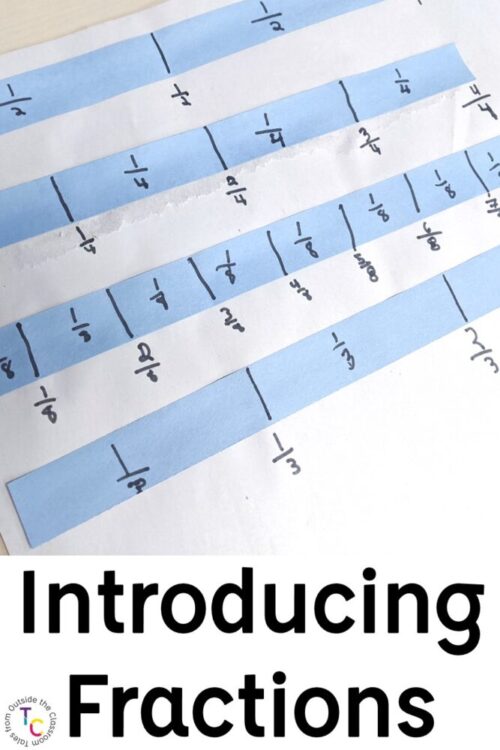
The most effective method of introducing fractions I used is by creating fraction strips reference posters we use throughout our unit. With one day’s lesson, we introduce and explore the concepts of unit fractions, fractions of a whole, fractions on a number line, same size wholes, comparing fractions and equivalent fractions. With commercially purchased fractions strips, students don’t build an understanding of how they work, in my experience. They use them, and they’re a great support, but they do little to build students’ fractions sense. Instead, students create their own fractions strips through this hands-on exploration. You can watch a video of this hands-on, interactive introduction to fractions lesson, or read through my detailed walkthrough below.
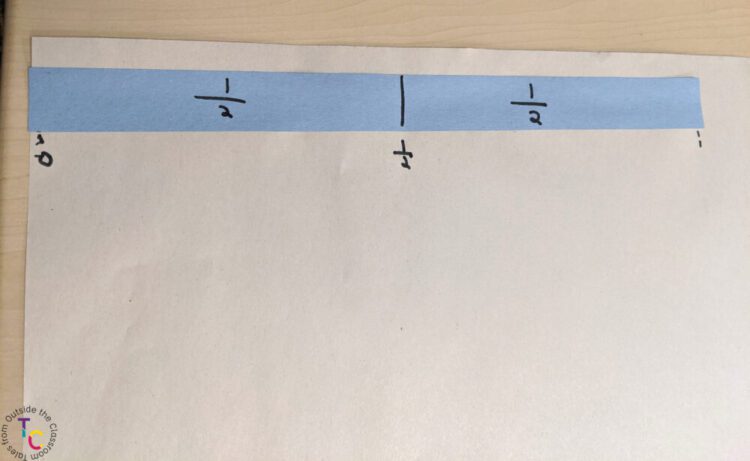
To begin, I cut many same size strips of construction paper and then have larger sized paper available as the base. I cut enough so each student can have six 9″ (standard construction paper width) strips. I also keep extras because someone will make a mistake and I like to have the extras to grab for on-the-spot reteaching throughout our unit. Each student uses a glue stick and a Sharpie for our lesson. Students divide the first strip in half and show the partition and label the unit fractions. We then label the strip as if it were a number line.
We then continue using the strips of paper to build additional fractions. By lining up the edges of the strips and the half point, it’s easy to explore the concepts of equivalence and same size wholes. Creating the fraction strips ourselves helps students truly understand.
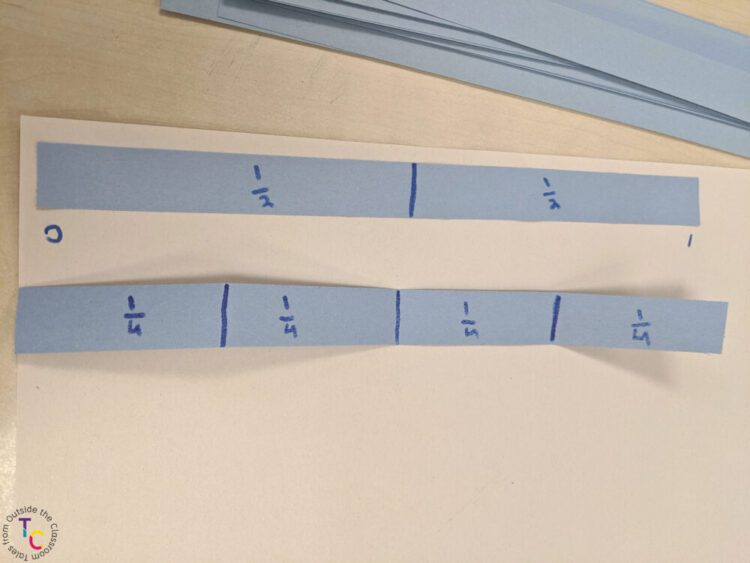
After dividing strips into fourths, the next strip is divided into eighths. By keeping the first strips as multiples of each other, it’s easier to explore and discuss equivalence. Here, students can easily see that 4/8 is equivalent to 1/2.

After working with eighths, I introduce thirds and then sixths. We discuss that 3/6 is equivalent to 1/2 despite being created by thirds. We explore why that equivalence works. Students always have a strong concept of doubles and halves so it’s easy for them to understand that three-sixths is half of the whole. By the end, we’ve worked through denominators of 2, 3, 4, 6, and 8.
Even though it’s just the beginning of our fractions work, the poster and fractions strips make it easy to introduce equivalence and comparisons. As students fold the strips, it’s very easy for them to understand that the larger denominator means each piece is smaller. This one lesson really sets the foundation for the rest of our fractions unit. The fractions strips reference posters stay available for students throughout the unit. We pull them back out when we get to the new concepts in our unit to refer back to. I also keep extra strips for on-the-spot lessons and reteaching. Because they’re the same tools we used in our introduction, it helps students make the connection between what they already know and their new learning.
Introduction to Fractions Anchor Chart
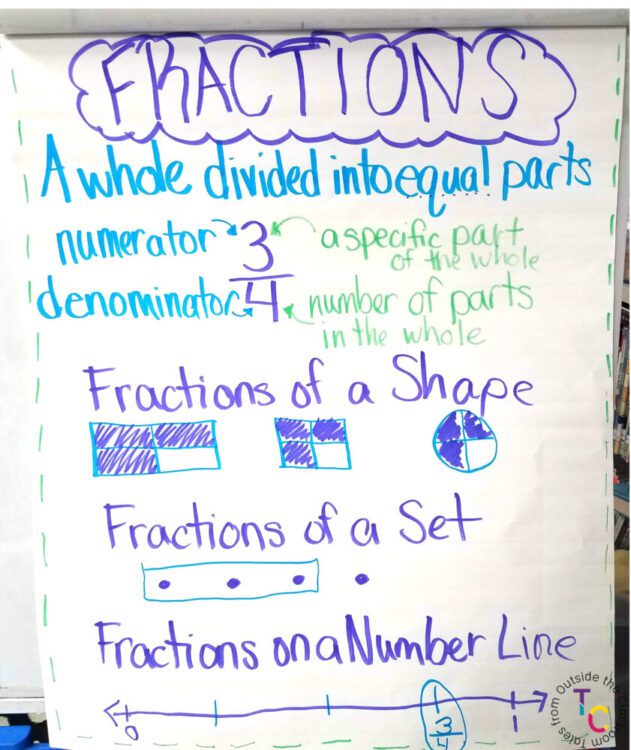
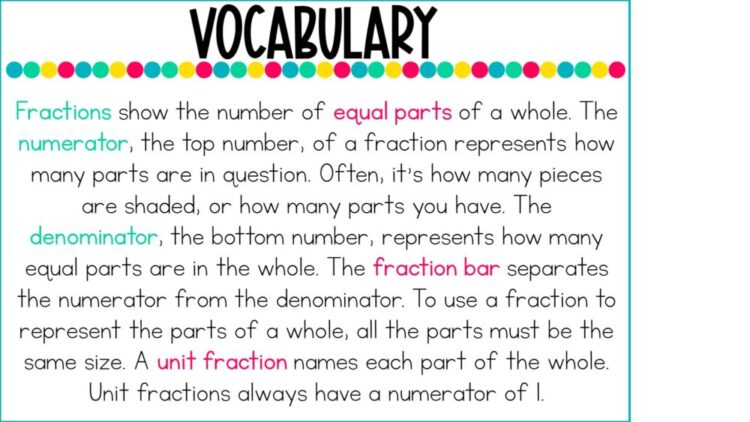
Before we begin our work the next day, we build an anchor chart to show our learning so far. Each year it’s somewhat similar to the one above, with students giving the fraction we’ll use and helping identify the terms numerator and denominator. Our discussion while creating the anchor chart helps define the vocabulary terms for the students. I like to make my anchor charts with my students at the beginning of another day’s lesson. I find it helps jumpstart our lesson with the information fresh in students’ minds. It also helps reinforce the information after students have had time to forget.
You may also like to check out my 10 Favorite Fractions Resources for 3rd Grade.
Introducing Fractions Centers
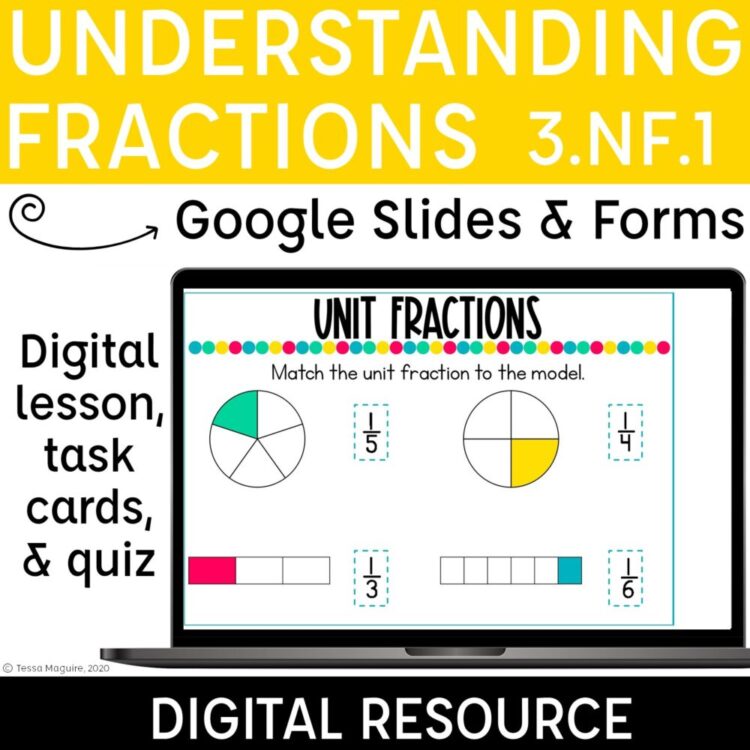
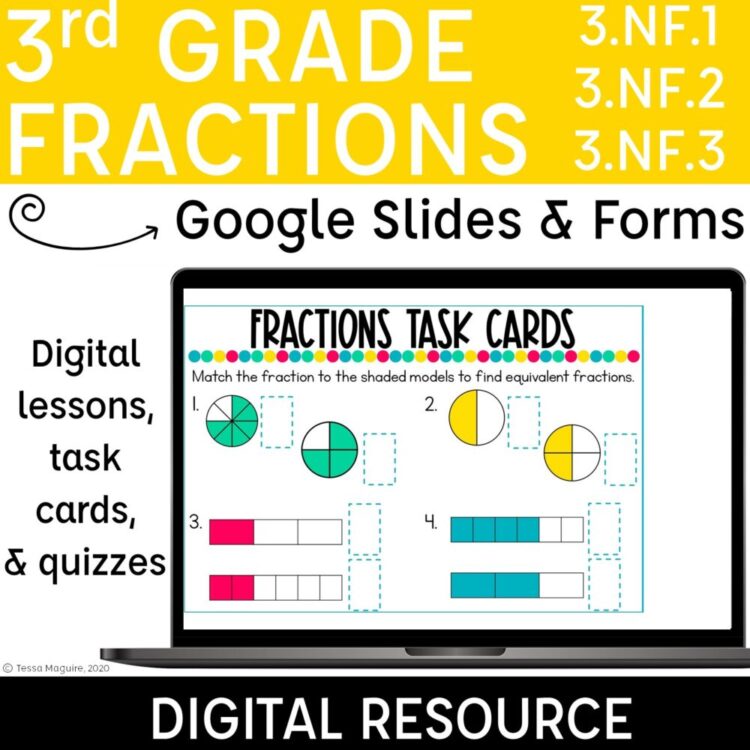
I use centers in my math lesson nearly daily. I like to teach within my small groups to keep students engaged, and to better see students as they work. When my students aren’t with me, they’re often working on their computers to reinforce and expand their learning. One of the ways I do that is with my digital content lessons. They walk through the vocabulary we’re working on in class, and build from concrete models of the concepts to abstract open-ended questions.
Students complete the digital lesson during centers one day and then complete digital task cards the next. The task cards give kids practice with the skill independently, and allow me an easy way to check over their learning when they’re not with me. Students access the Google Slides file from Google Classroom so I can flip through students’ work in just a few minutes.
Both the digital lesson and the digital task cards are part of my Introduction to Fractions Digital Resource. In the file, is also a Google Forms assessment. I can use this as an assessment, but most often, I use it as an in-class formative check. The results let me know who needs additional practice and gives me an opportunity to clean up any common mistakes and misconceptions. I use this partway through the week and then form reteaching groups based on the results. You can head to TpT to take a closer look at my Introduction to Fractions Digital Resources.
I also jump right into Fractions on a Number Line. With our fraction strips lesson, students already have a foundation, but they need a lot of practice and reinforcement. We use the fraction strip to reinforce the concept of one whole. I talk with my students about “zooming in” using a microscope to see the numbers between the whole. Fractions allow us to see the numbers that are less than one. After my students have gone through the lesson on fractions of a shape, they independently work through my Fractions on a Number Line Digital Resources.
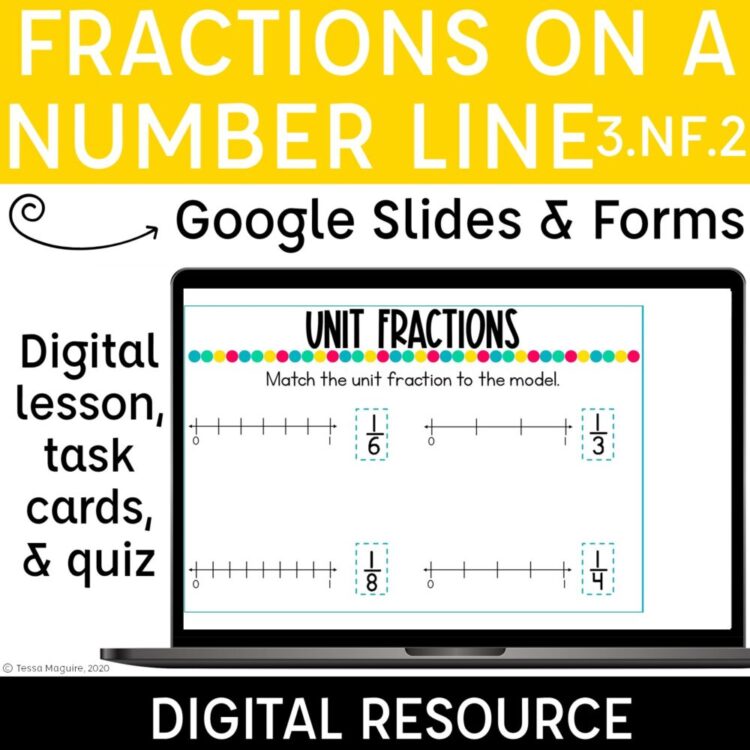
Both of these are also included as part of my Fractions Digital Resources Bundle. These resources are perfect for distance learning as students practice independently. But, I’ve also used them as part of my in-class instruction as independent centers reinforcing what we do together.
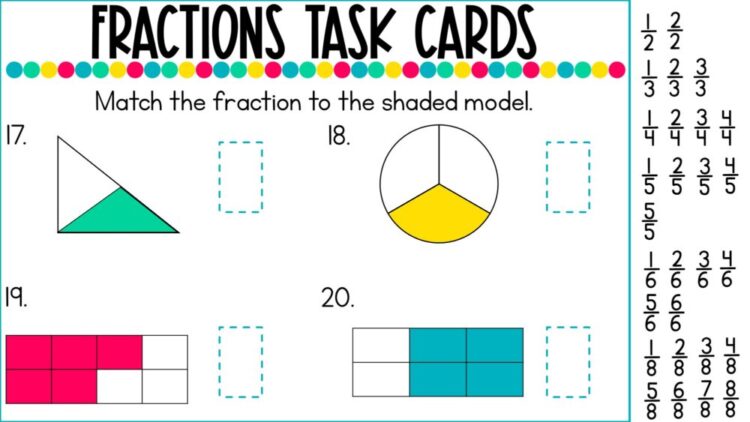
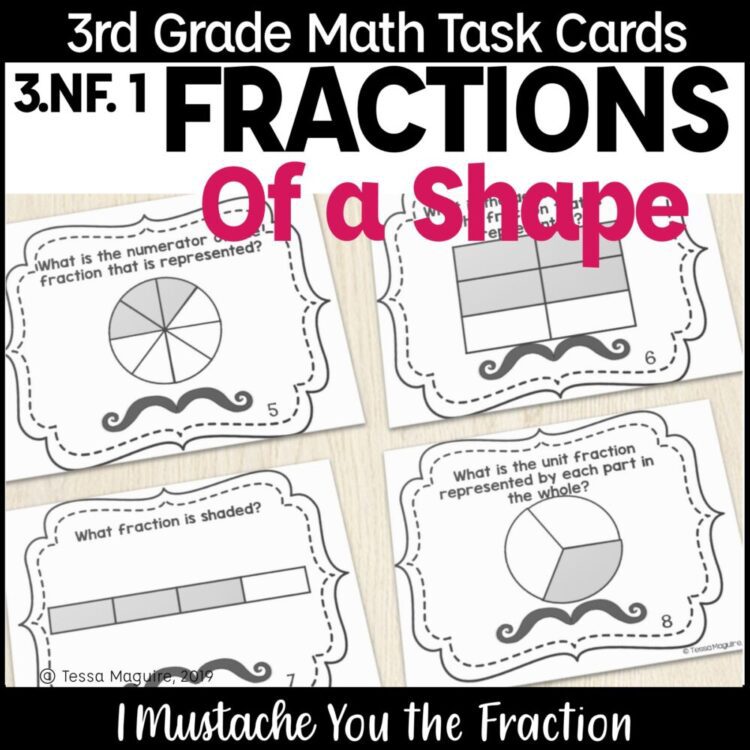
I also use printable task cards during my fractions unit. I have a small class, so there are many more task cards included than students. So, we do some together as a class for review, and then students solve them independently. While I do use task cards for whole class review in fun ways, I also print several to a page and then print them for practice in centers. Because 4 are already on a page, I often print 4 pages per page, and then there are 16 on one page for students to answer during centers. My Fractions of a Shape task cards are free in my TpT store.
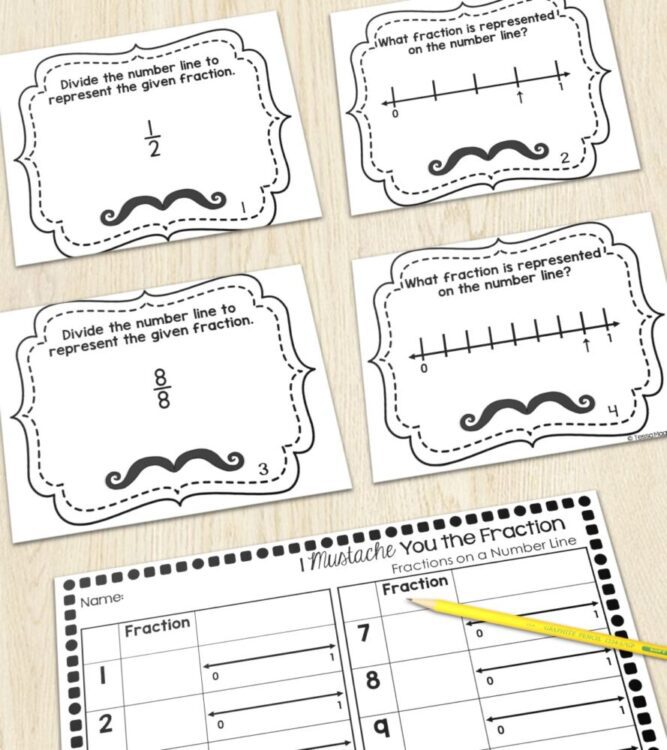
I also have Fractions on a Number Line task cards. For whatever reason, putting the fractions on a line throws so many of my kids off. So, I always add in several days of practice and spiral it throughout our unit. I love these because students practice both identification and partitioning. My students always seem to have a much more difficult time partitioning the lines themselves. One way I’ve used these is by having students do the evens one day and the odds another so each day’s practice is working on the other skill.
Fractions of a Set using M & M’s
Hands down, my favorite math manipulative is food. It ups the student engagement, and beginning with concrete explorations is so important. As I was walking through Costco one day I saw these ginormo bags of M&M’s and knew that was exactly what I was going to use to introduce my fractions unit! I’ve used this lesson several times over the years and it’s always a hit!

Students then sort them into colors and record the amounts on their recording sheet. Then we all come together and discuss what we knew about fractions. After, students record their fractions on the right side of their recording sheet.
I’ve also upped the level a bit with my third graders by partnering them up. Each student has their own recording sheet and records their new amounts and fractions. You can even take it a step further by creating groups using partner pairs.
If you’d like to download the recording sheets I used, just click the image below.
We continue working with fractions for several weeks but these lessons and resources get us off on the right foot. I spiral the task cards throughout the next several weeks to review and reinforce our previous learning.